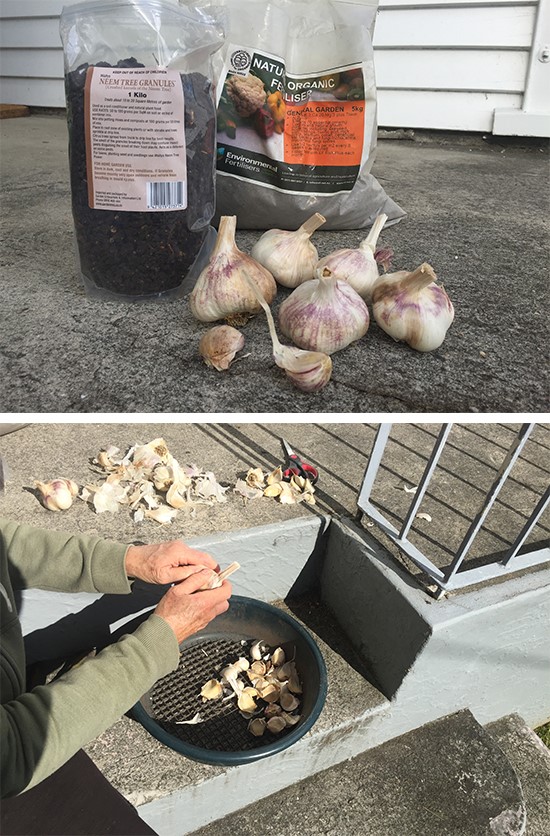
Firstly, my lovely fat Takahue seed garlic arrived and has been planted. Remember we’re in the north, and our advice is to grow garlic that comes from somewhere local to you.
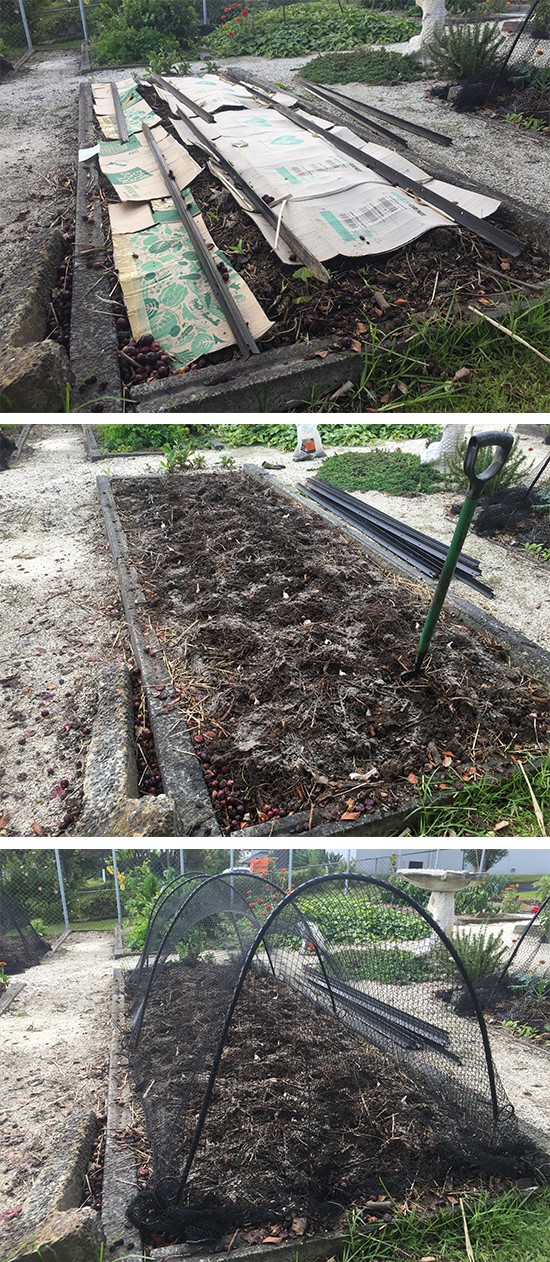
This was formerly the tomatoes bed and we’d fed it up and covered it. So off came the covers, and I aerated the bed by forking and lifting but not turning the soil. The homemade compost on the top is chunky but I bedded in 3 rows of 16 cloves per row, so if all goes according to plan, we’ll have a good haul. The cloves are only half covered due to our frequent rainfall and the possibility of the cloves rotting. I used up a bag of neem granules sprinkled round the cloves in my attempt to head off rust this season. I plan to spray with neem oil regularly once the cloves shoot. A dressing of rock dust and netting against birds pecking the cloves out completes the process.
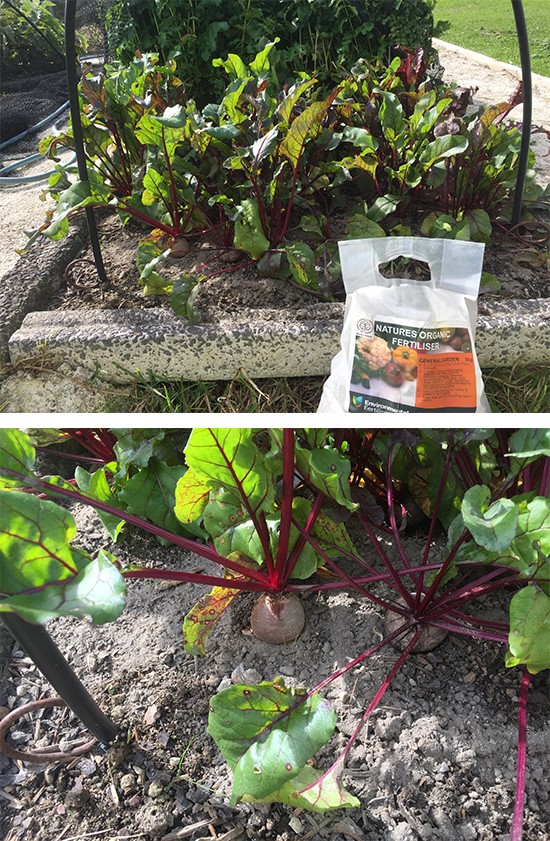
The growing beetroot crop gets a dressing of rock dust too to help size them up.
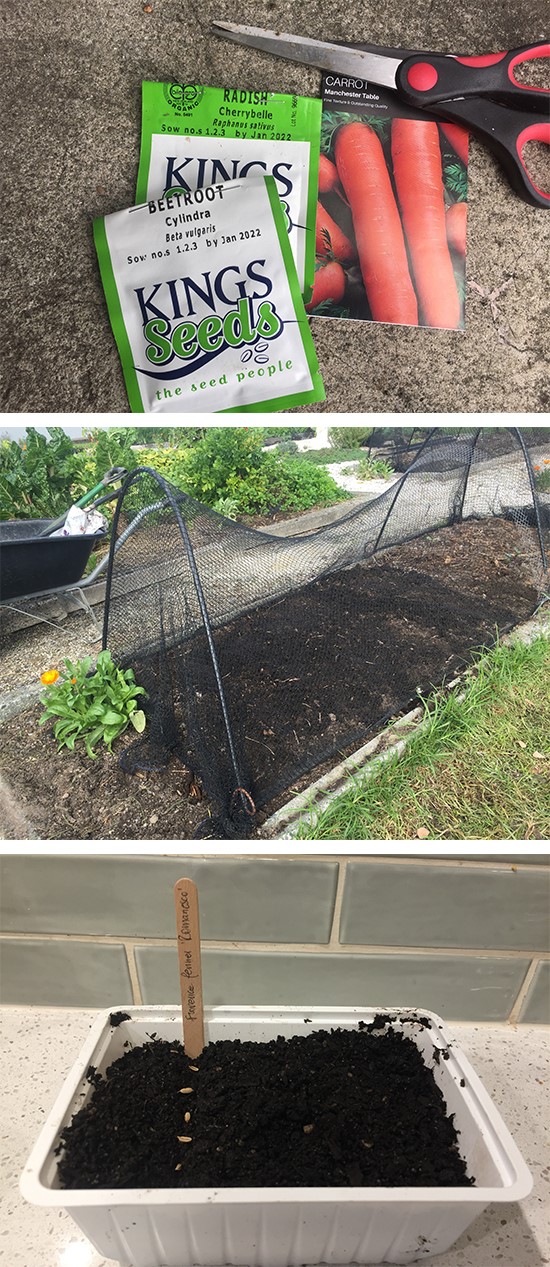
More root crops are sown – carrots, beetroot and radishes directly into the ground and Florence fennel Romanesco (the winter version) into a punnet. Remember to buy fresh seed for carrots and onions. There is Spring Onion Tokyo Long White in the bed too, but not in the seed packets shot (as I had to rush off and buy some more onion seed). I planted the spring onion in between two rows of carrots as it’s a good companion plant for carrots.
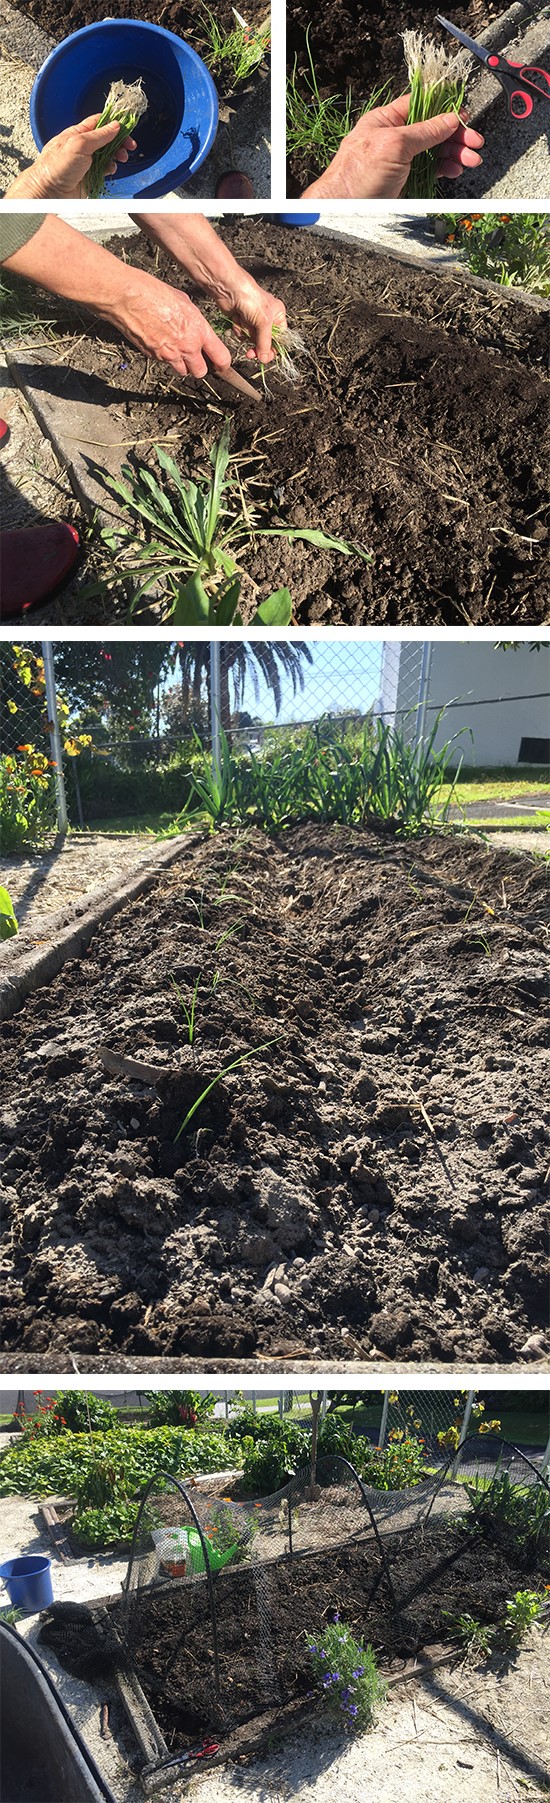
On that note, I bought new Californian Red onion seed and new Pukekohe Longkeeper onion seed. The red onions all came up and the brown onions made a single showing (see the right of the shot!). Remember if this happens to you too it’s not your fault – the brown onion seed I bought must not have been fresh. So in the interests of getting these onions in on time in the right moon phase, I’ve bought Pukekohe Longkeeper seedlings.
I create mounds for the seedlings to go in so that they don’t rot. Don’t make the mounds too high though as during the season they can start crumbling and expose roots. Then I bareroot the seedlings, washing the dirt off in a bucket of water. The roots are a little bit too long, so I give them a trim in order to give the seedlings a kick start. Then with my trusty dibber I plant one seedling at a time around 15cm apart. They are spindly, so I’ll nurse the remaining seedlings along so I have some to replace any casualties. Netting is essential against cats and birds.
We have viola seedlings that have self seeded, and I was going to pop those in the troughs now. Violas will help keep weeds down which is important for onions as weeds are usually stronger than them. And violas don’t compete with onions for space or nutrients either. But on reflection I thought the violas were much stronger than the onion seedlings at this point in time, so I’ll wait until the onions get going before transplanting the violas.
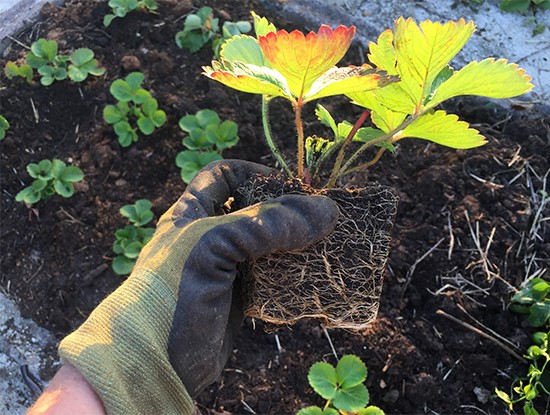
Next crop to attend to is our strawberries. These are our plants made from runners from the summer crop.
The root system is so strong on these plants that I’m going to plant them out now. Otherwise they might become root bound. If you’re not in this position, just wait till they’re in the shops and then you can plant early next year.
Firstly I created trenches into which I put chicken manure, then I covered them back up with soil creating little mounds on which to plant the strawberries (apologies for not having an image of this – it was getting dark and I was racing against time and forgot to take the photo). Like the onions we do this to avoid the plant rotting. The reason for burying the chicken manure in the mound is that at first we want to encourage root growth, then when the roots get down to the chicken manure that will boost leaf growth. Later on we’ll fertilise for fruiting.
In this first image you see the plants in and I’ve sprinkled Flowers of Sulphur round them to acidify the soil as strawberries do better with a lower pH. After that I applied handfuls of Dave’s Humate (quickly becoming a favourite!) and also rock dust (Natures Organic Fertiliser). Then I filled the troughs with straw to keep the mounds supported and finally laid more straw round each plant to keep it clean for when the fruit starts appearing. Then the usual netting to keep birds out.
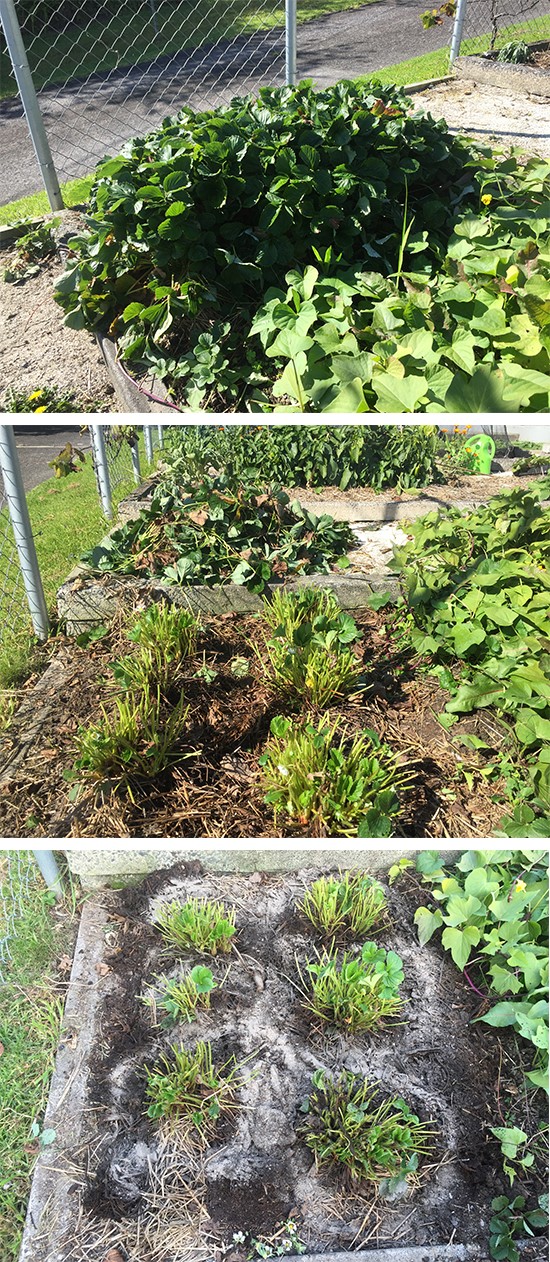
Then on to the plants from last summer. These guys are getting a cut back and a feed of compost, Dave’s Humate and rock dust. It’ll be interesting to compare the performance of the first and second year plants.
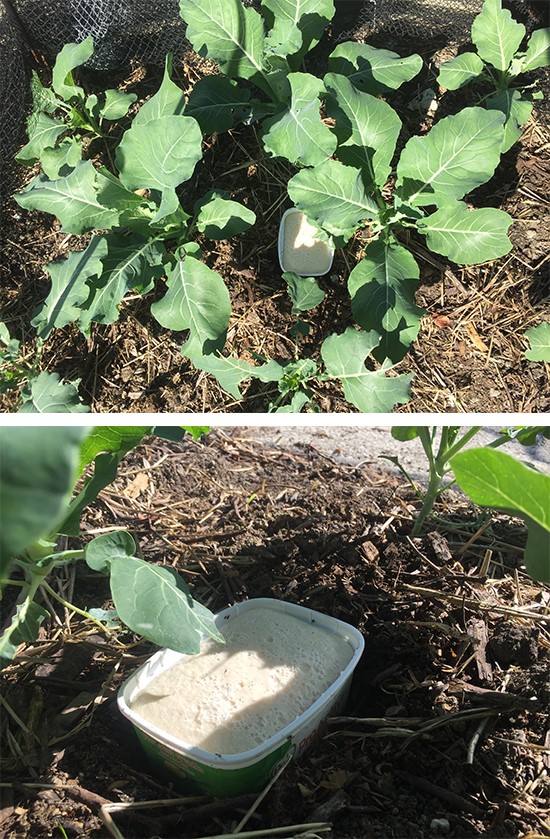
One of the two other jobs that it’s good to get done at this time is topping up yeast traps to catch slugs and snails in your brassica beds. After rain I always make a new batch – 1 teaspoon white sugar + 1 teaspoon dried yeast to 1 cup warm water. We’re catching little slugs as well as leopard slugs.
And if you’ve got the room sow a green manure crop. I won’t have space till next month.
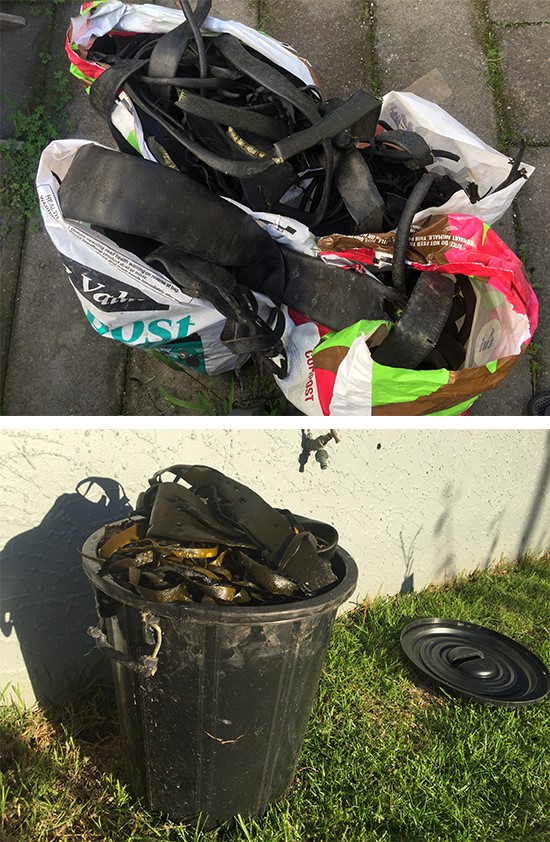
And lastly for this post, we did a trip to the beach yesterday and got some beautiful kelp. This time it was dry and high up on the beach, so I feel we got a lot more than last time when it was wet and heavy. I could only fit one bag into the usual bucket I make liquid seaweed from, so that means there’ll be plenty to get us through winter. Simply fill your bucket with seaweed then add water to the top of the container and leave for 2-3 weeks (the lid’s not on in this shot, but it usually is). Then I’ll apply it liberally over the whole garden once a month to keep everything in the best of health and also add a plethora of nutrients.
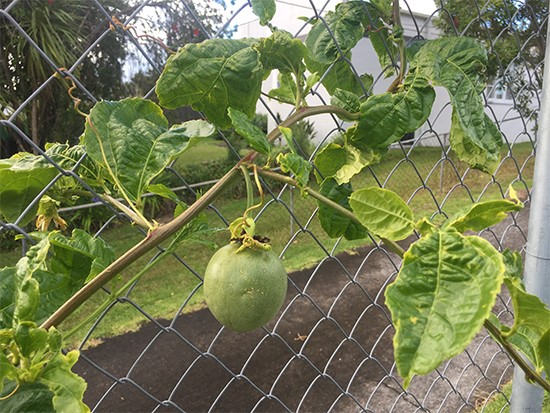
Our first passionfruit sizing up!
Happy late Autumn gardening!
From Jan, Rob and the Team at OEG!
4 Responses
Thanks for your blog – so inspiring! I’m fairly new to gardening and have inherited a decent sized garden. I’m wondering about my asparagus? I’ve tied the stalks loosely together over the last few months and let the feathery long stems (about a metre or a bit longer) remain. I’m just wondering if I leave it alone and the feathery bits might just fall away over winter? I’m unsure how old the asparagus is but it looks like it could be ready to eat this year. Thanks for any advice.
Melissa
Hi Melissa
Yes that’s good. Leave the asparagus fronds to die back naturally as this focusses the plants’ energy into the crown. When they’re completely brown, which is usually around June, depending on where you are in the country, chop the ferns back to ground level. In spring, feed them up well with anything like blood and bone, sheep pellets or chicken manure, rock dust and some mulch and they’ll come away for you. Asparagus is ready to eat from the get go. They’ll be spindly and not many of them in the first year, but after that they increase in production. All the best!
Hi Rachel
The strawberry plants are absolutely fine and coming away nicely now. Flowers are forming but I’m nipping those out for 2-3 months.
We don’t wash our kelp.
All the best 🙂


4 Responses
Thanks for your blog – so inspiring! I’m fairly new to gardening and have inherited a decent sized garden. I’m wondering about my asparagus? I’ve tied the stalks loosely together over the last few months and let the feathery long stems (about a metre or a bit longer) remain. I’m just wondering if I leave it alone and the feathery bits might just fall away over winter? I’m unsure how old the asparagus is but it looks like it could be ready to eat this year. Thanks for any advice.
Melissa
Hi Melissa
Yes that’s good. Leave the asparagus fronds to die back naturally as this focusses the plants’ energy into the crown. When they’re completely brown, which is usually around June, depending on where you are in the country, chop the ferns back to ground level. In spring, feed them up well with anything like blood and bone, sheep pellets or chicken manure, rock dust and some mulch and they’ll come away for you. Asparagus is ready to eat from the get go. They’ll be spindly and not many of them in the first year, but after that they increase in production. All the best!
Wow, you really trimmed the old strawberries hard!
Do wash the kelp, I heard you should rinse off the salt first?
Hi Rachel
The strawberry plants are absolutely fine and coming away nicely now. Flowers are forming but I’m nipping those out for 2-3 months.
We don’t wash our kelp.
All the best 🙂